PAPER MOON PHOTO BACKDROP
Halloween is one of my favorite times of the year. It is usually the unofficial end to any autumnal heatwaves in San Francisco, and it also holds the distinction of being the final fun holiday before the dreaded Christmas.
For 2023, we thought it would be fun to host a costume party, complete with a photobooth utilizing a century-old backdrop, the paper moon.
I saw this as yet another opportunity to take photos of people (my favorite type of photograph), as well as an opportunity to attempt to build something physical, which is a nice break from my usual virtual mode of creation.
PLANNING & DESIGN
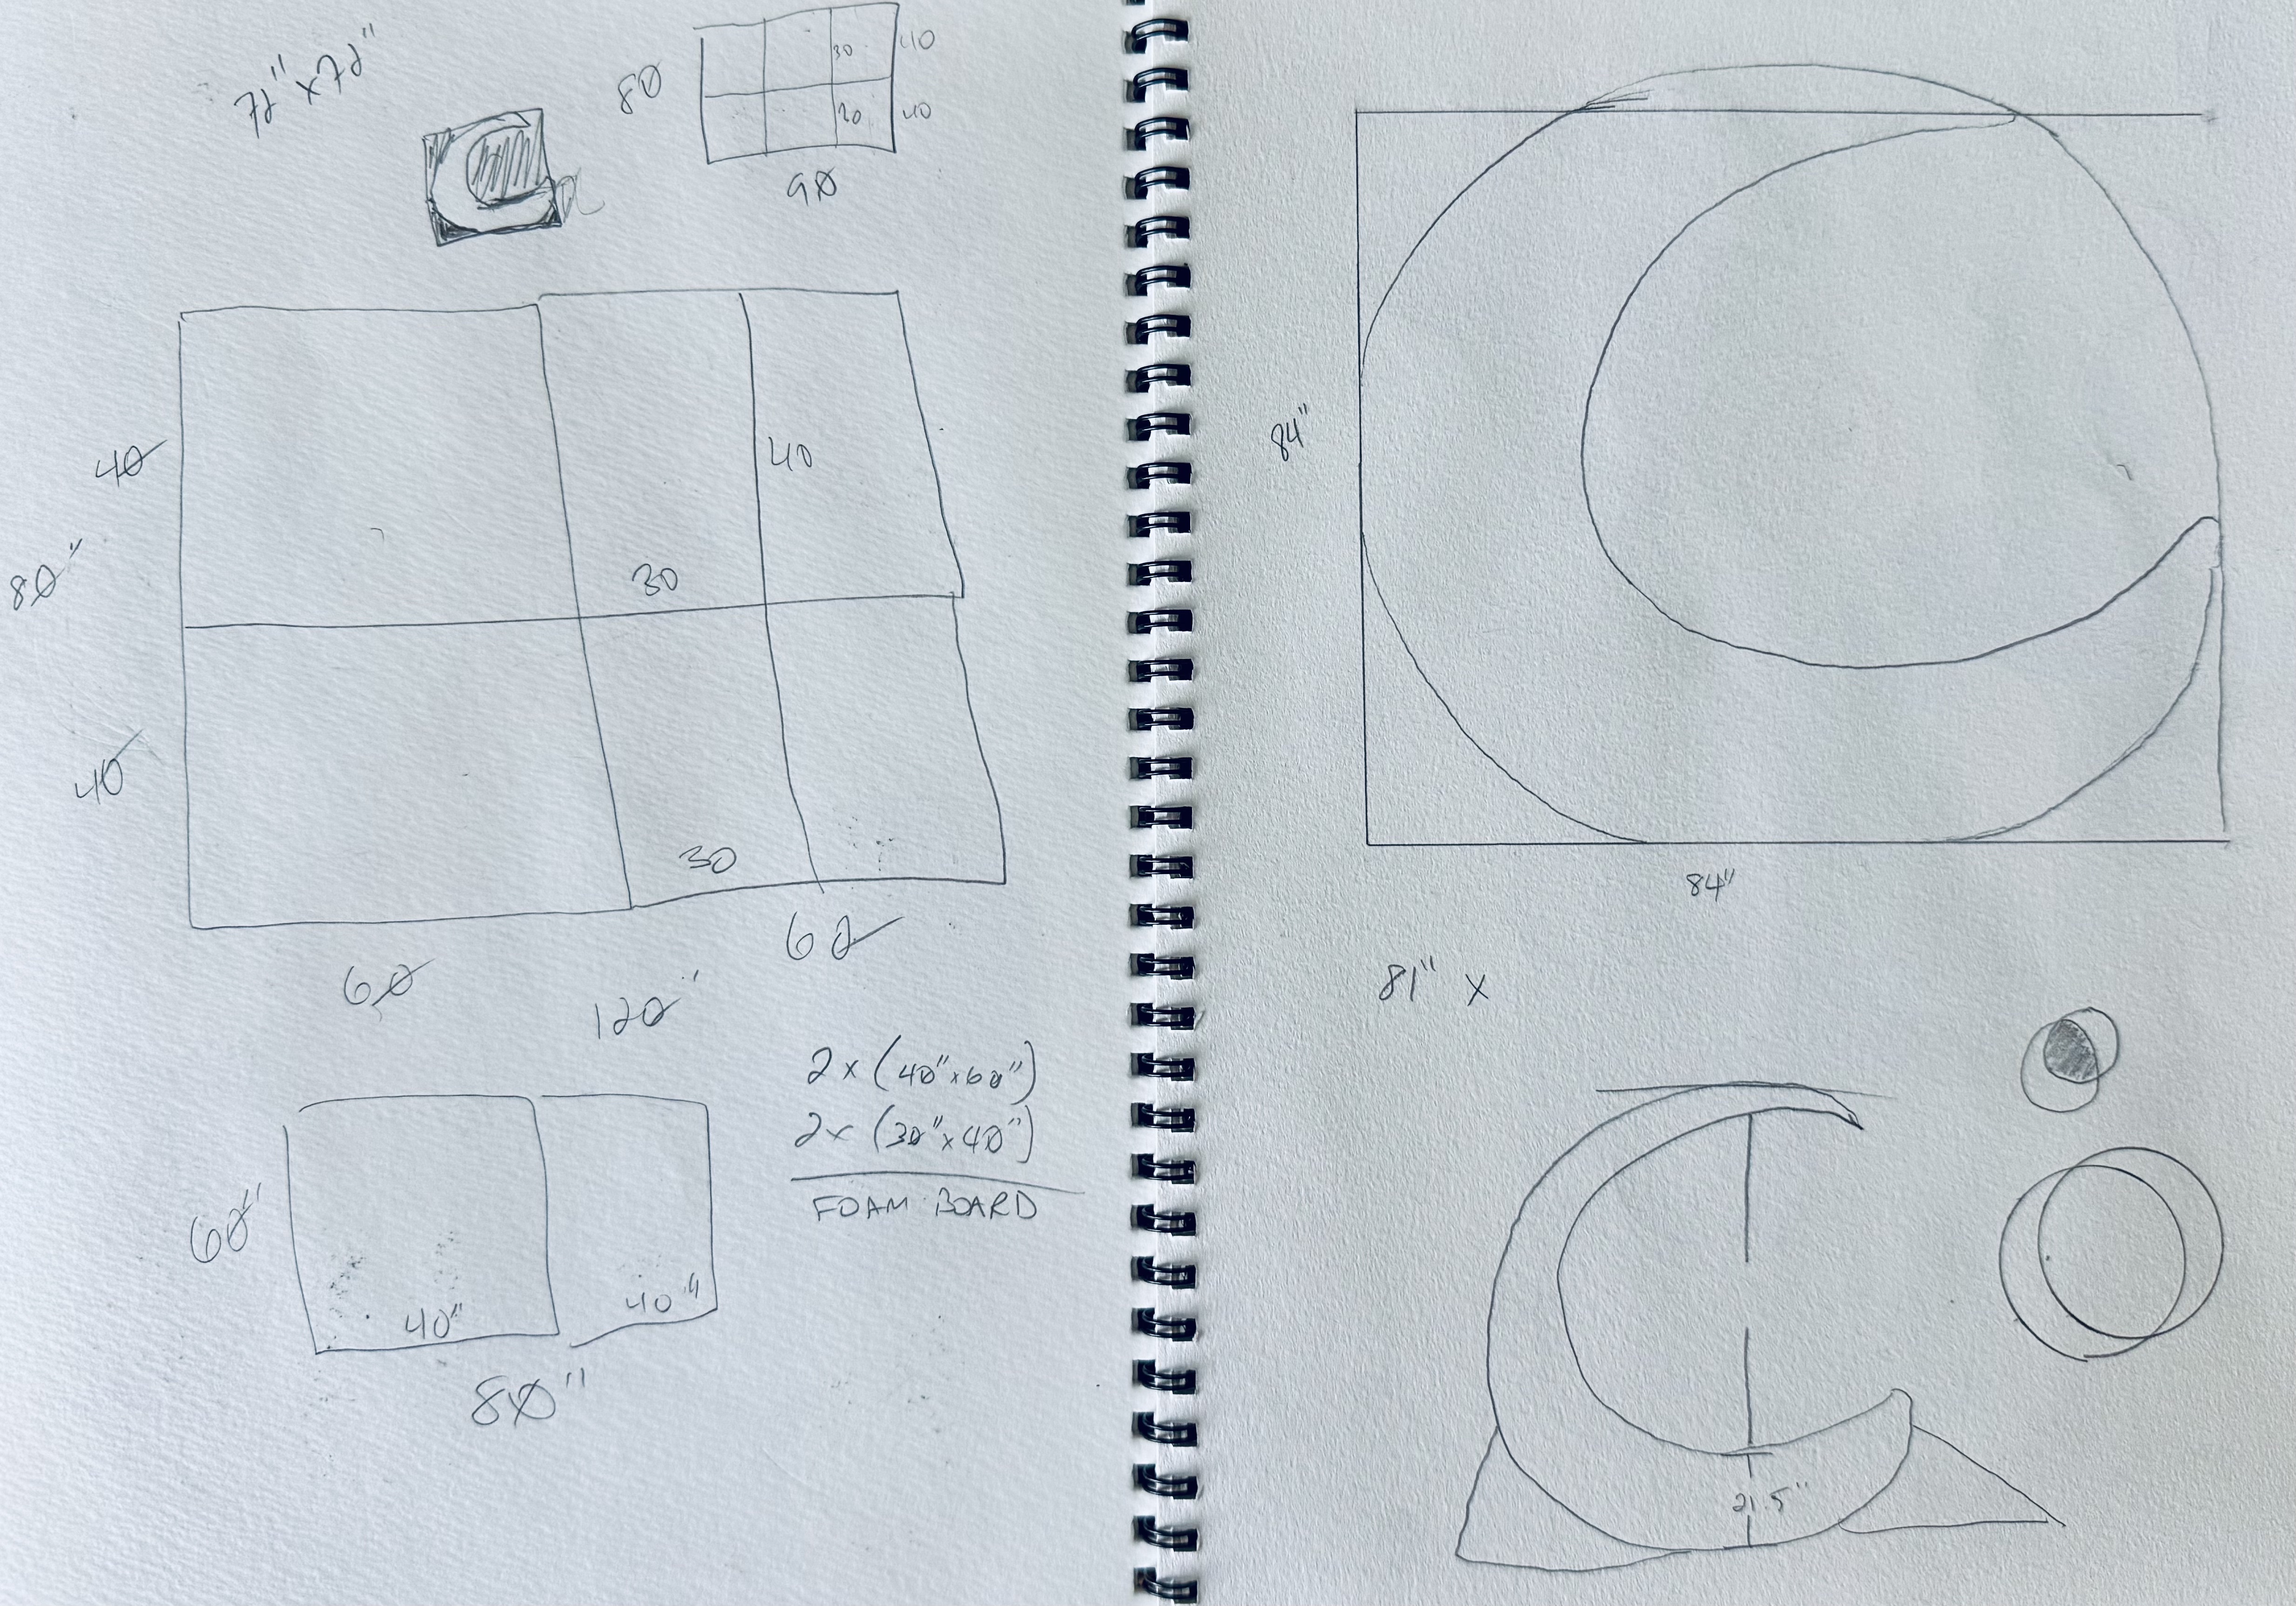
The first thing I had to do was figure out what materials I would use.
I ended up landing on foam core boards, but since it’s very hard to find an 80" x 120" single piece of board, I had to go with 4 30" x 40" and 2 60" x 40" boards (the craft store that delivered late only had these quantities and sizes available). I then taped these to a wall in a big rectangular shape measuring 80" x 120".
To draw a moon with a perfectly circular shape, I realized that I could use two differently sized circles, with the smaller circle cutting out the negative space of the crescent moon shape.
At first I tried using intersecting circles, but I noticed that the resulting crescent moon didn’t have as much overhang of the photo subject as I would have liked.
I then decided to have the smaller circle be a proper subset of the larger circle, and have them overlapping along part of their circumference (almost like tangent circles but not really).
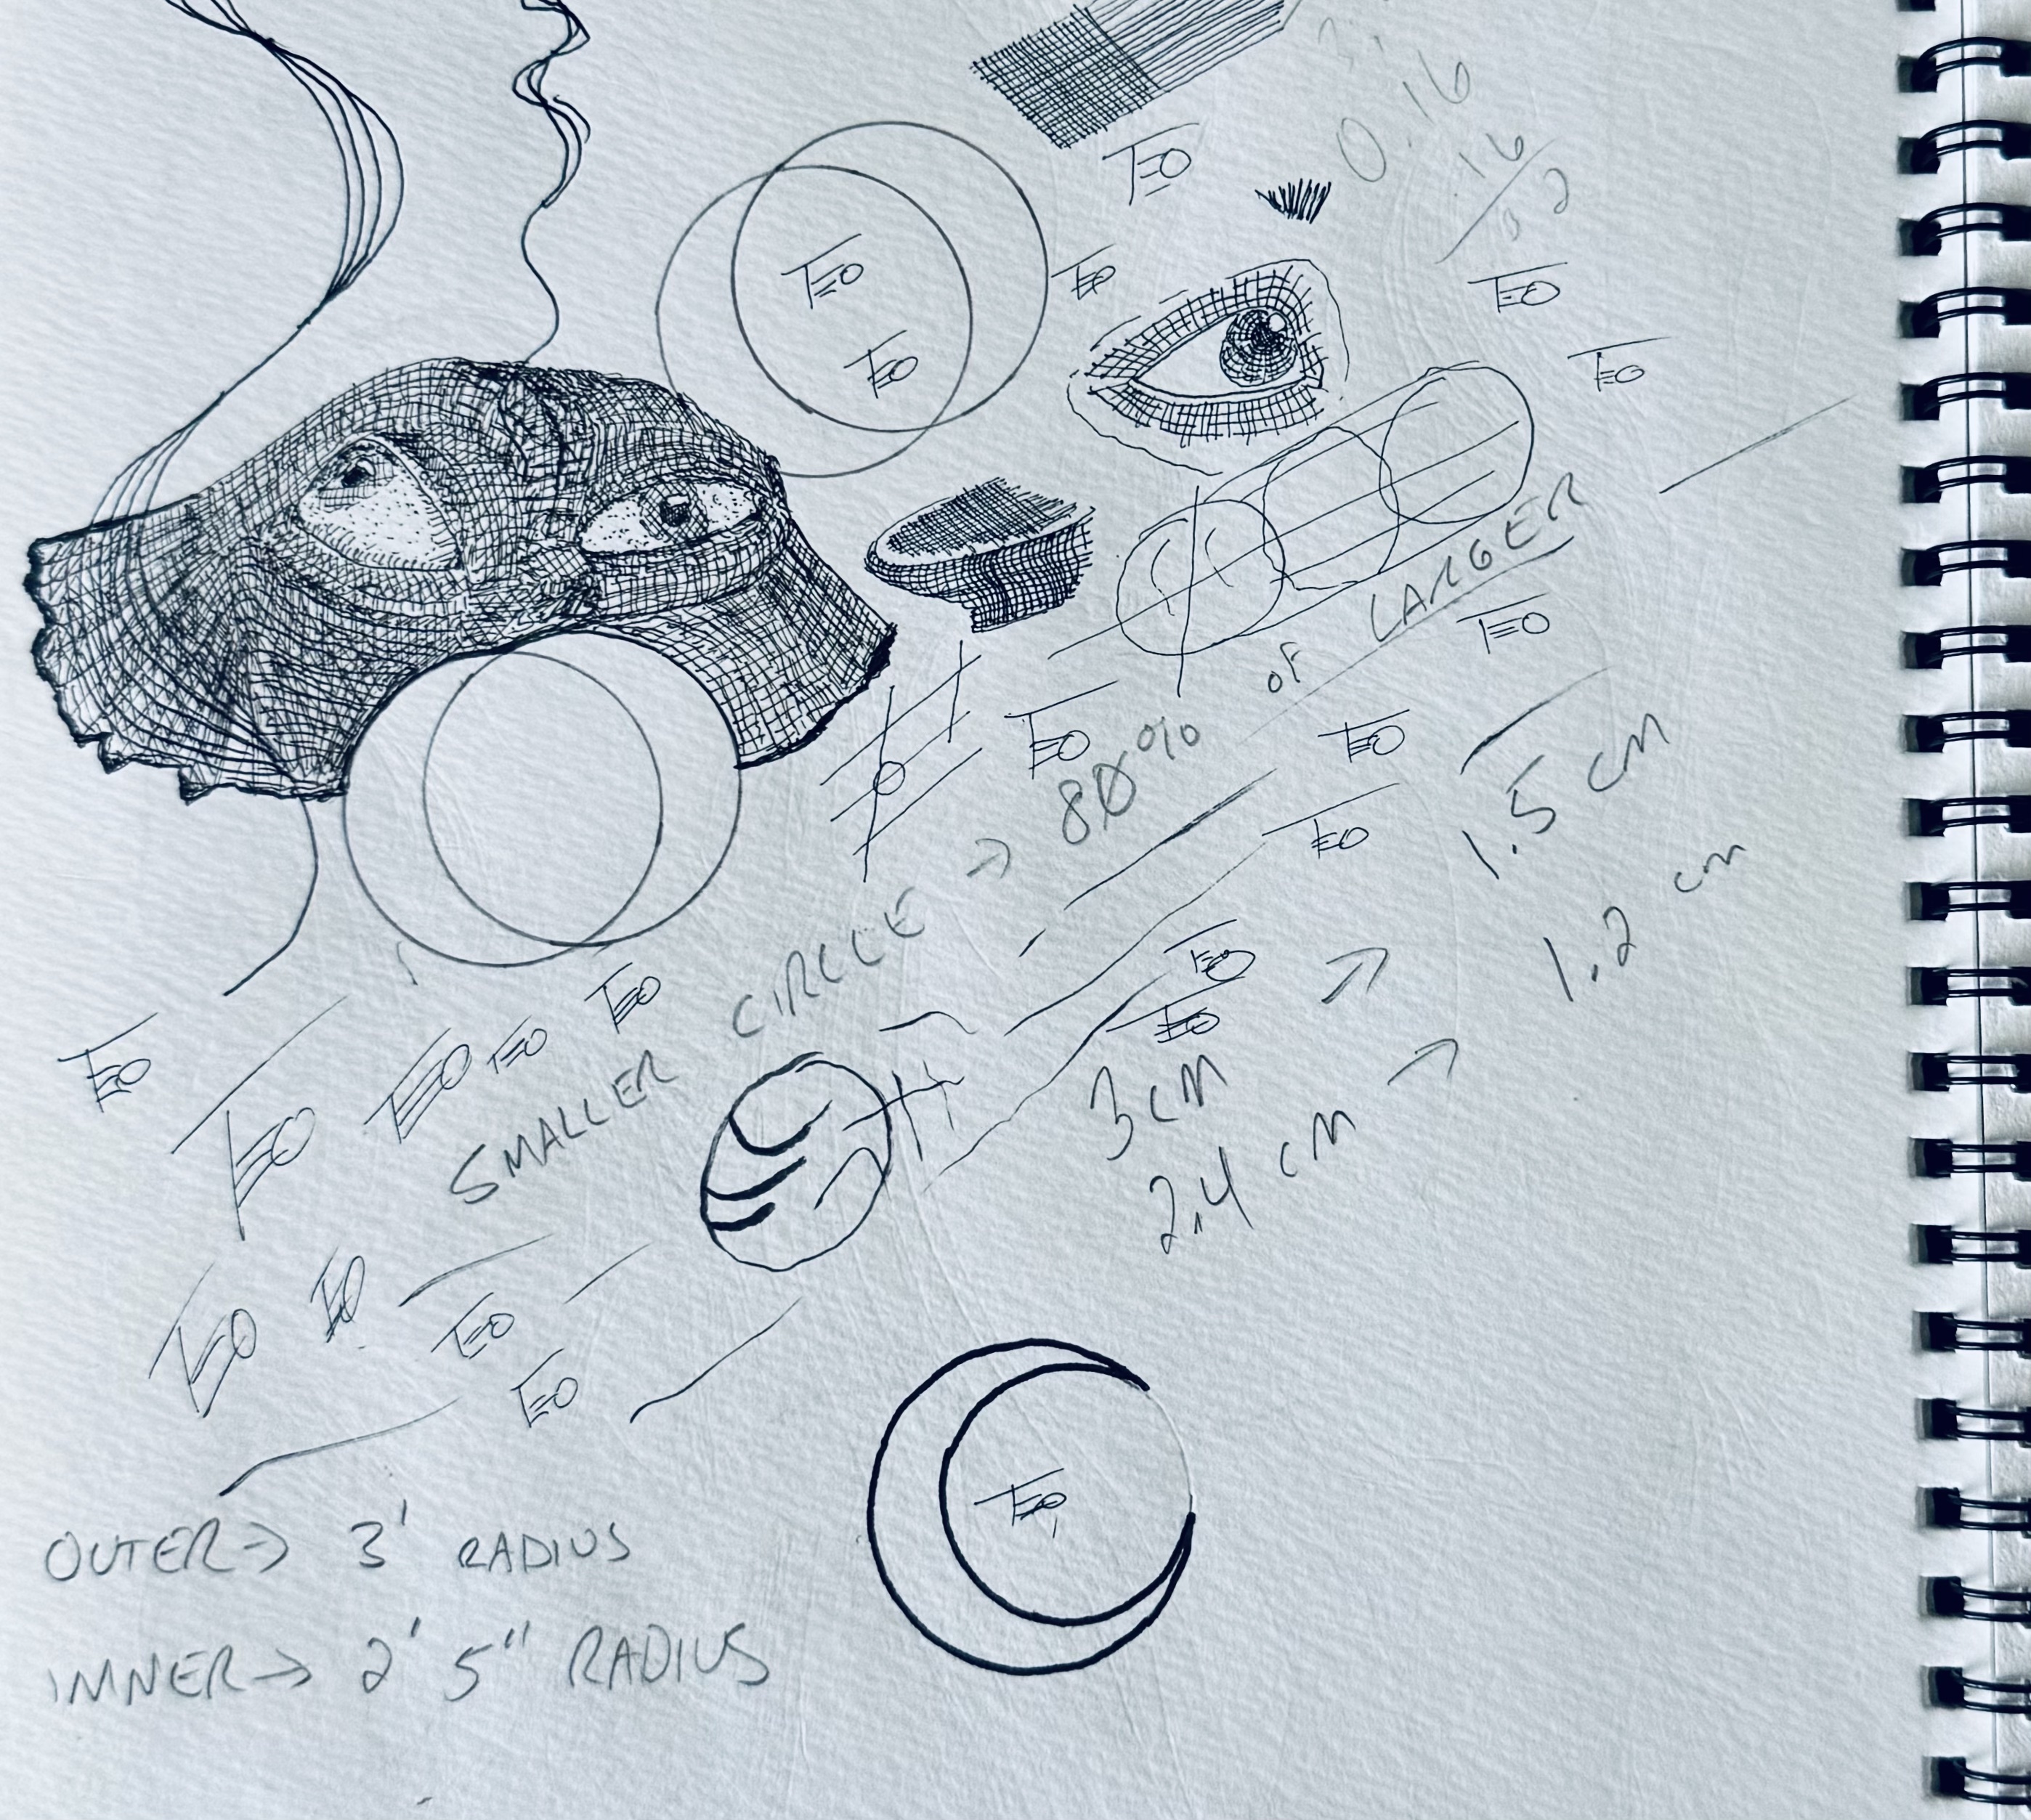
To draw the circles, I simply attached a pen to the center of each circle with a string whose length was equal to the radius of each circle and used that as a guide.
Please excuse my sloppy drafting and handwriting:
I’m given to doodling when thinking:
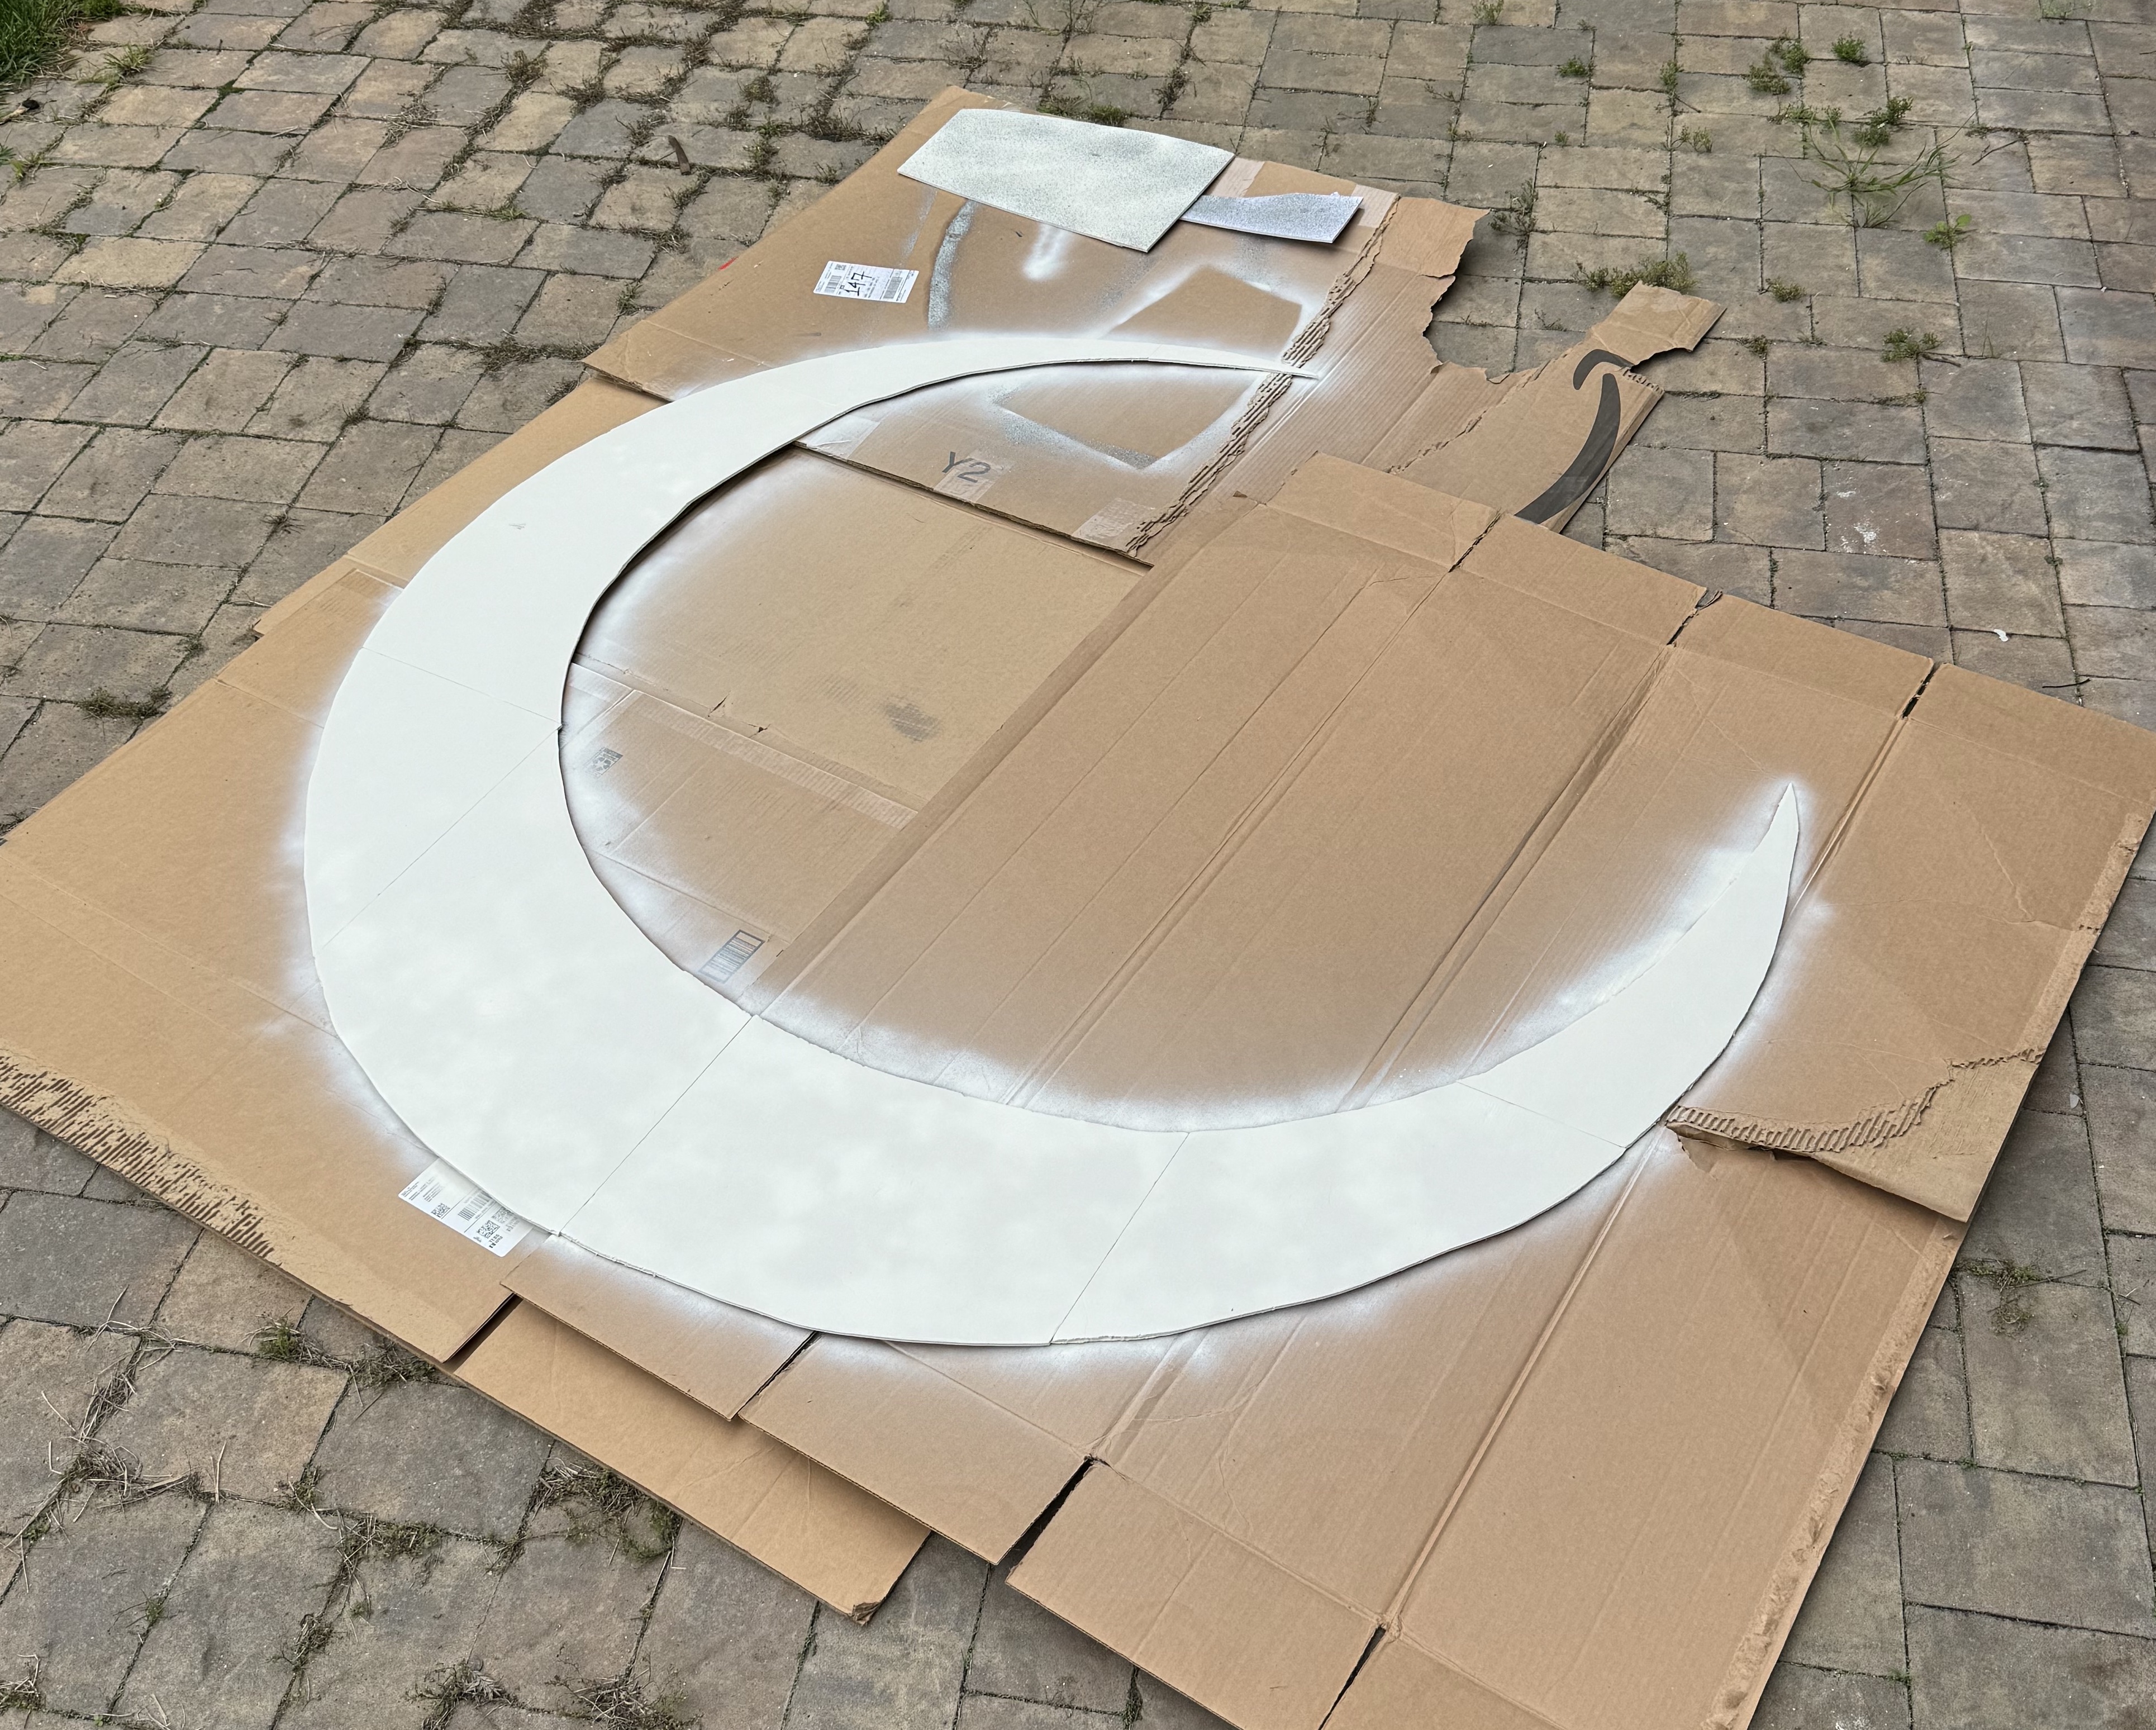
After drawing the circles on the posterboards, I cut out the constituent pieces of the moon, to be assembled with duct tape and painting stir sticks next:

ASSEMBLY & PAINTING
After designing and cutting the pieces of the moon from the foam core board, I had to assemble them into the final shape. As mentioned above, I used duct tape with paint stir sticks as support on the backside of the moon (unfortunately I didn’t think to take any photos of this).
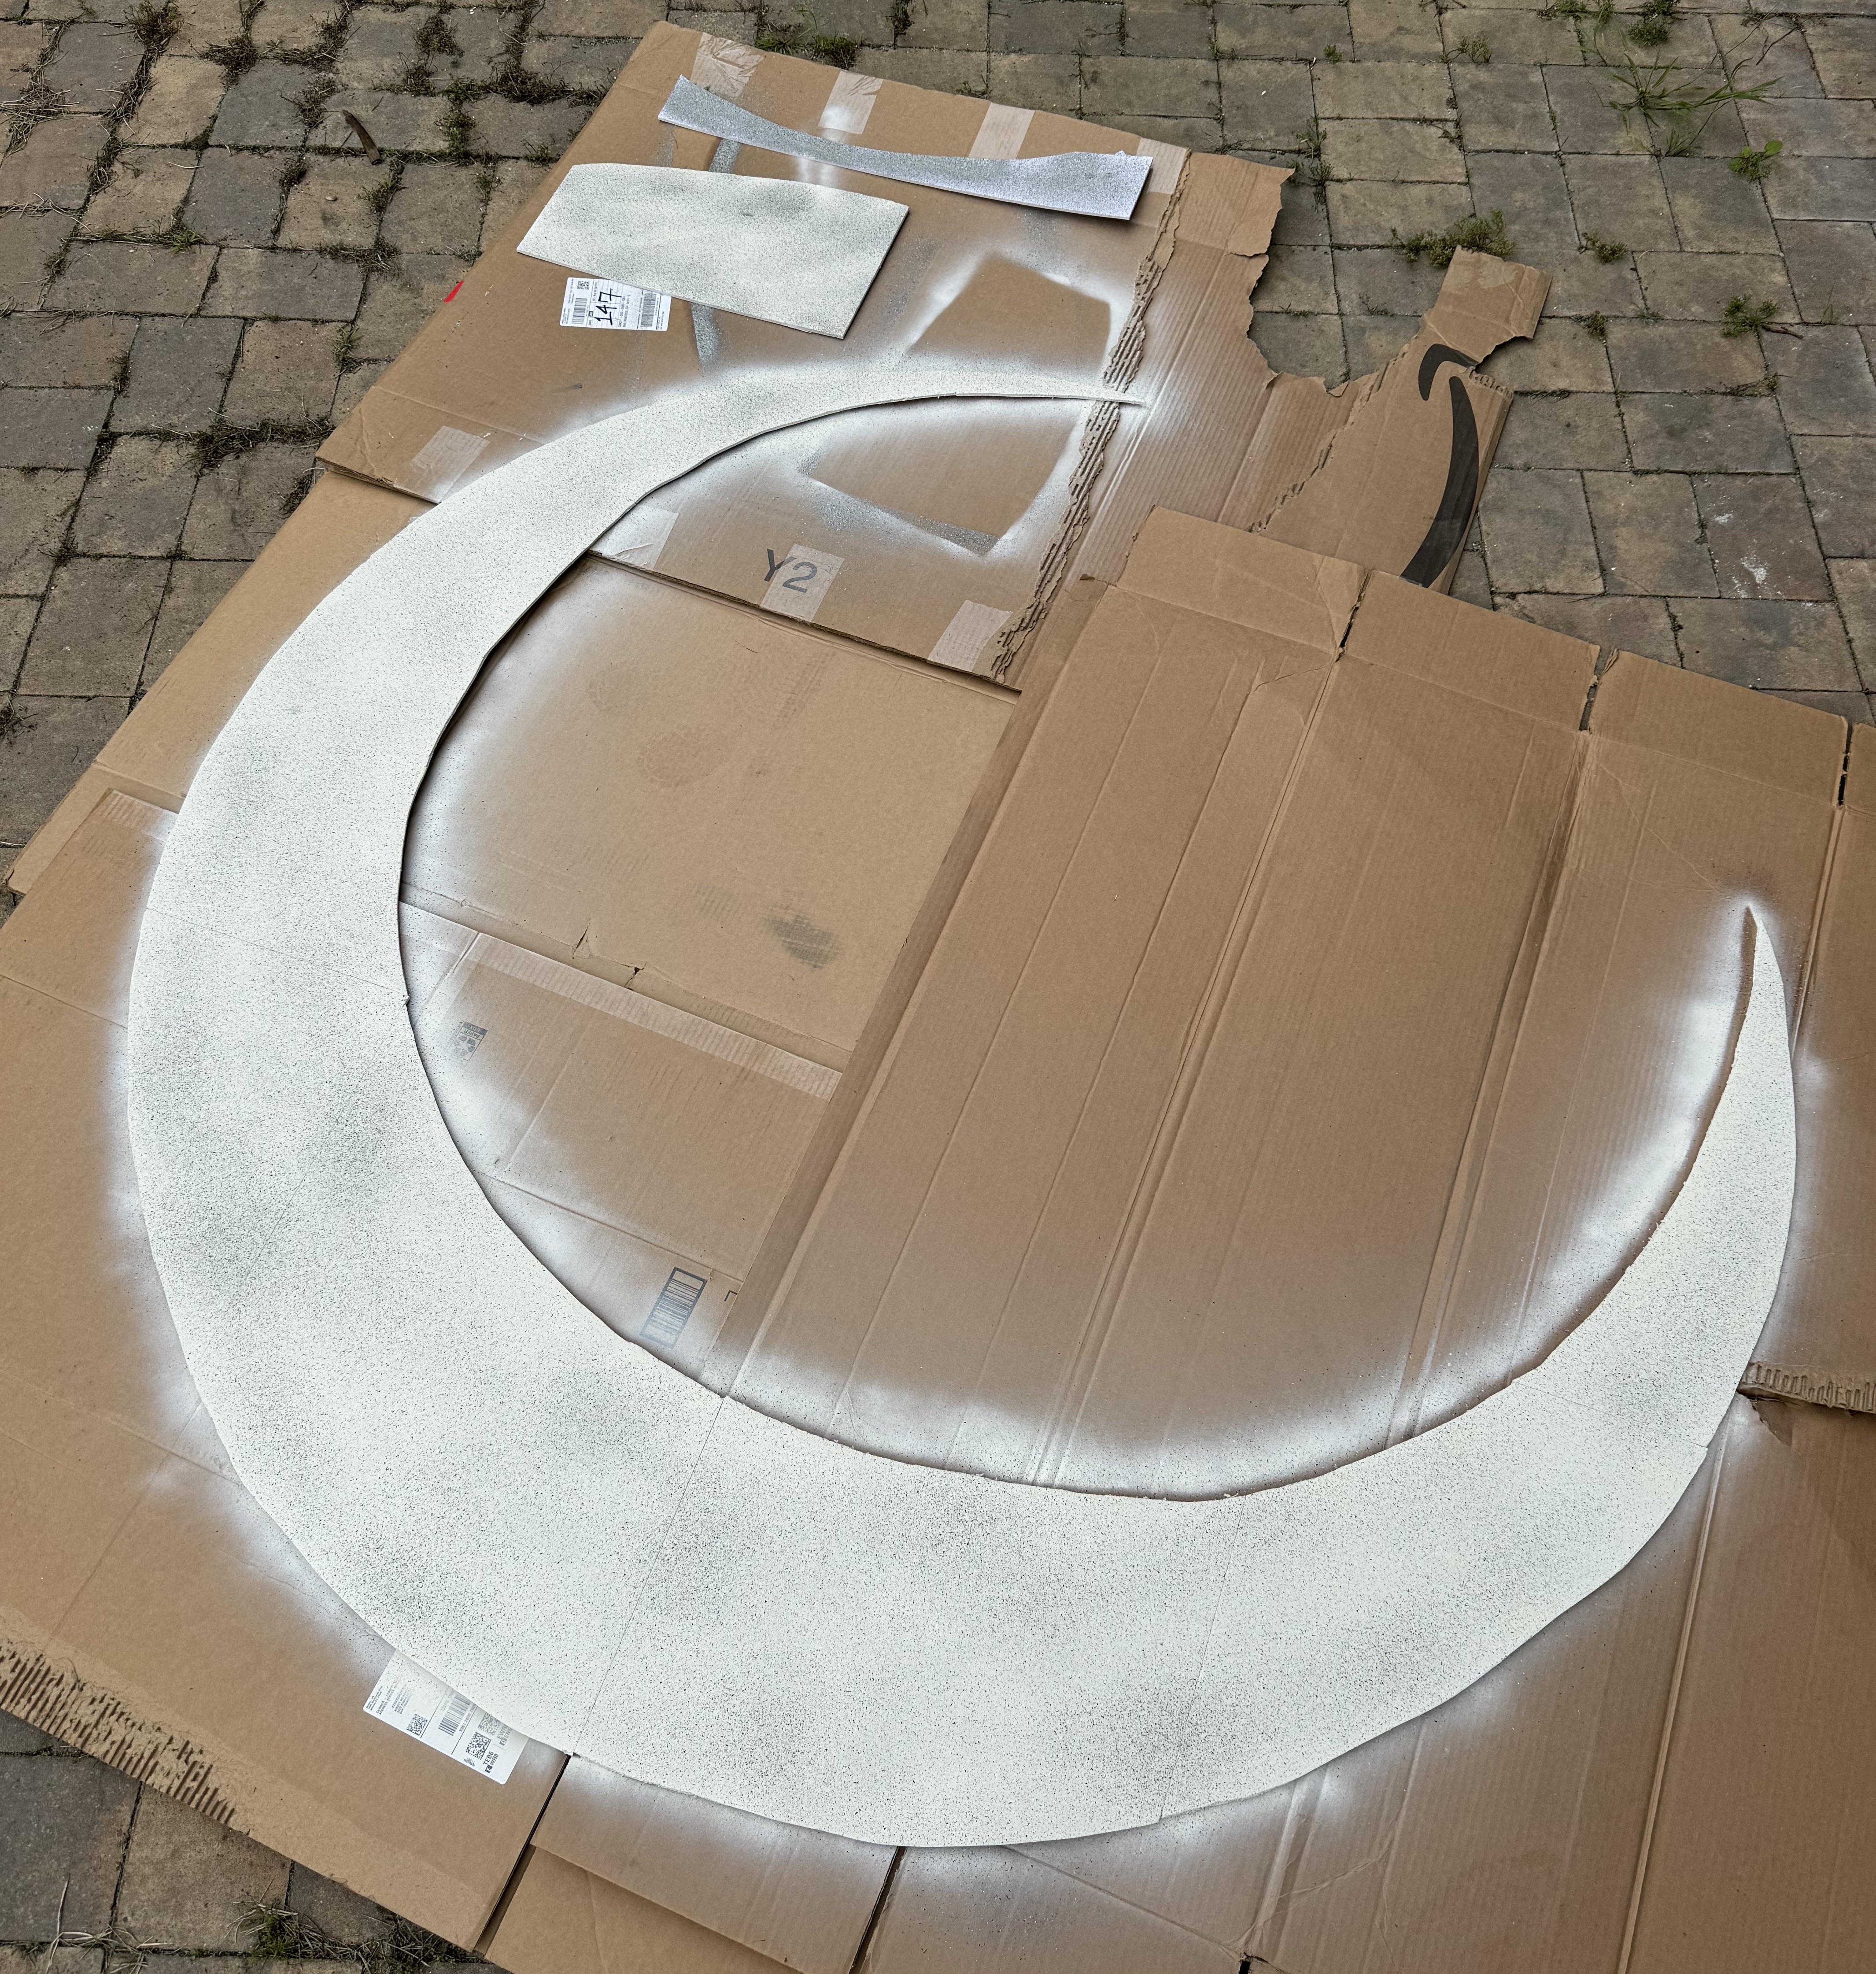
After assembling the pieces of the crescent shape, I spray-painted it with two types of paint, a primer:
followed by a stone spray, to add some moon-like texture:
After finishing the crescent shape, I assembled the base shape, spray-painted it black, and attached it to the crescent shape.
I used a piano bench as the seat, and I found that attaching the moon to the bench provided a great base to keep it upright:
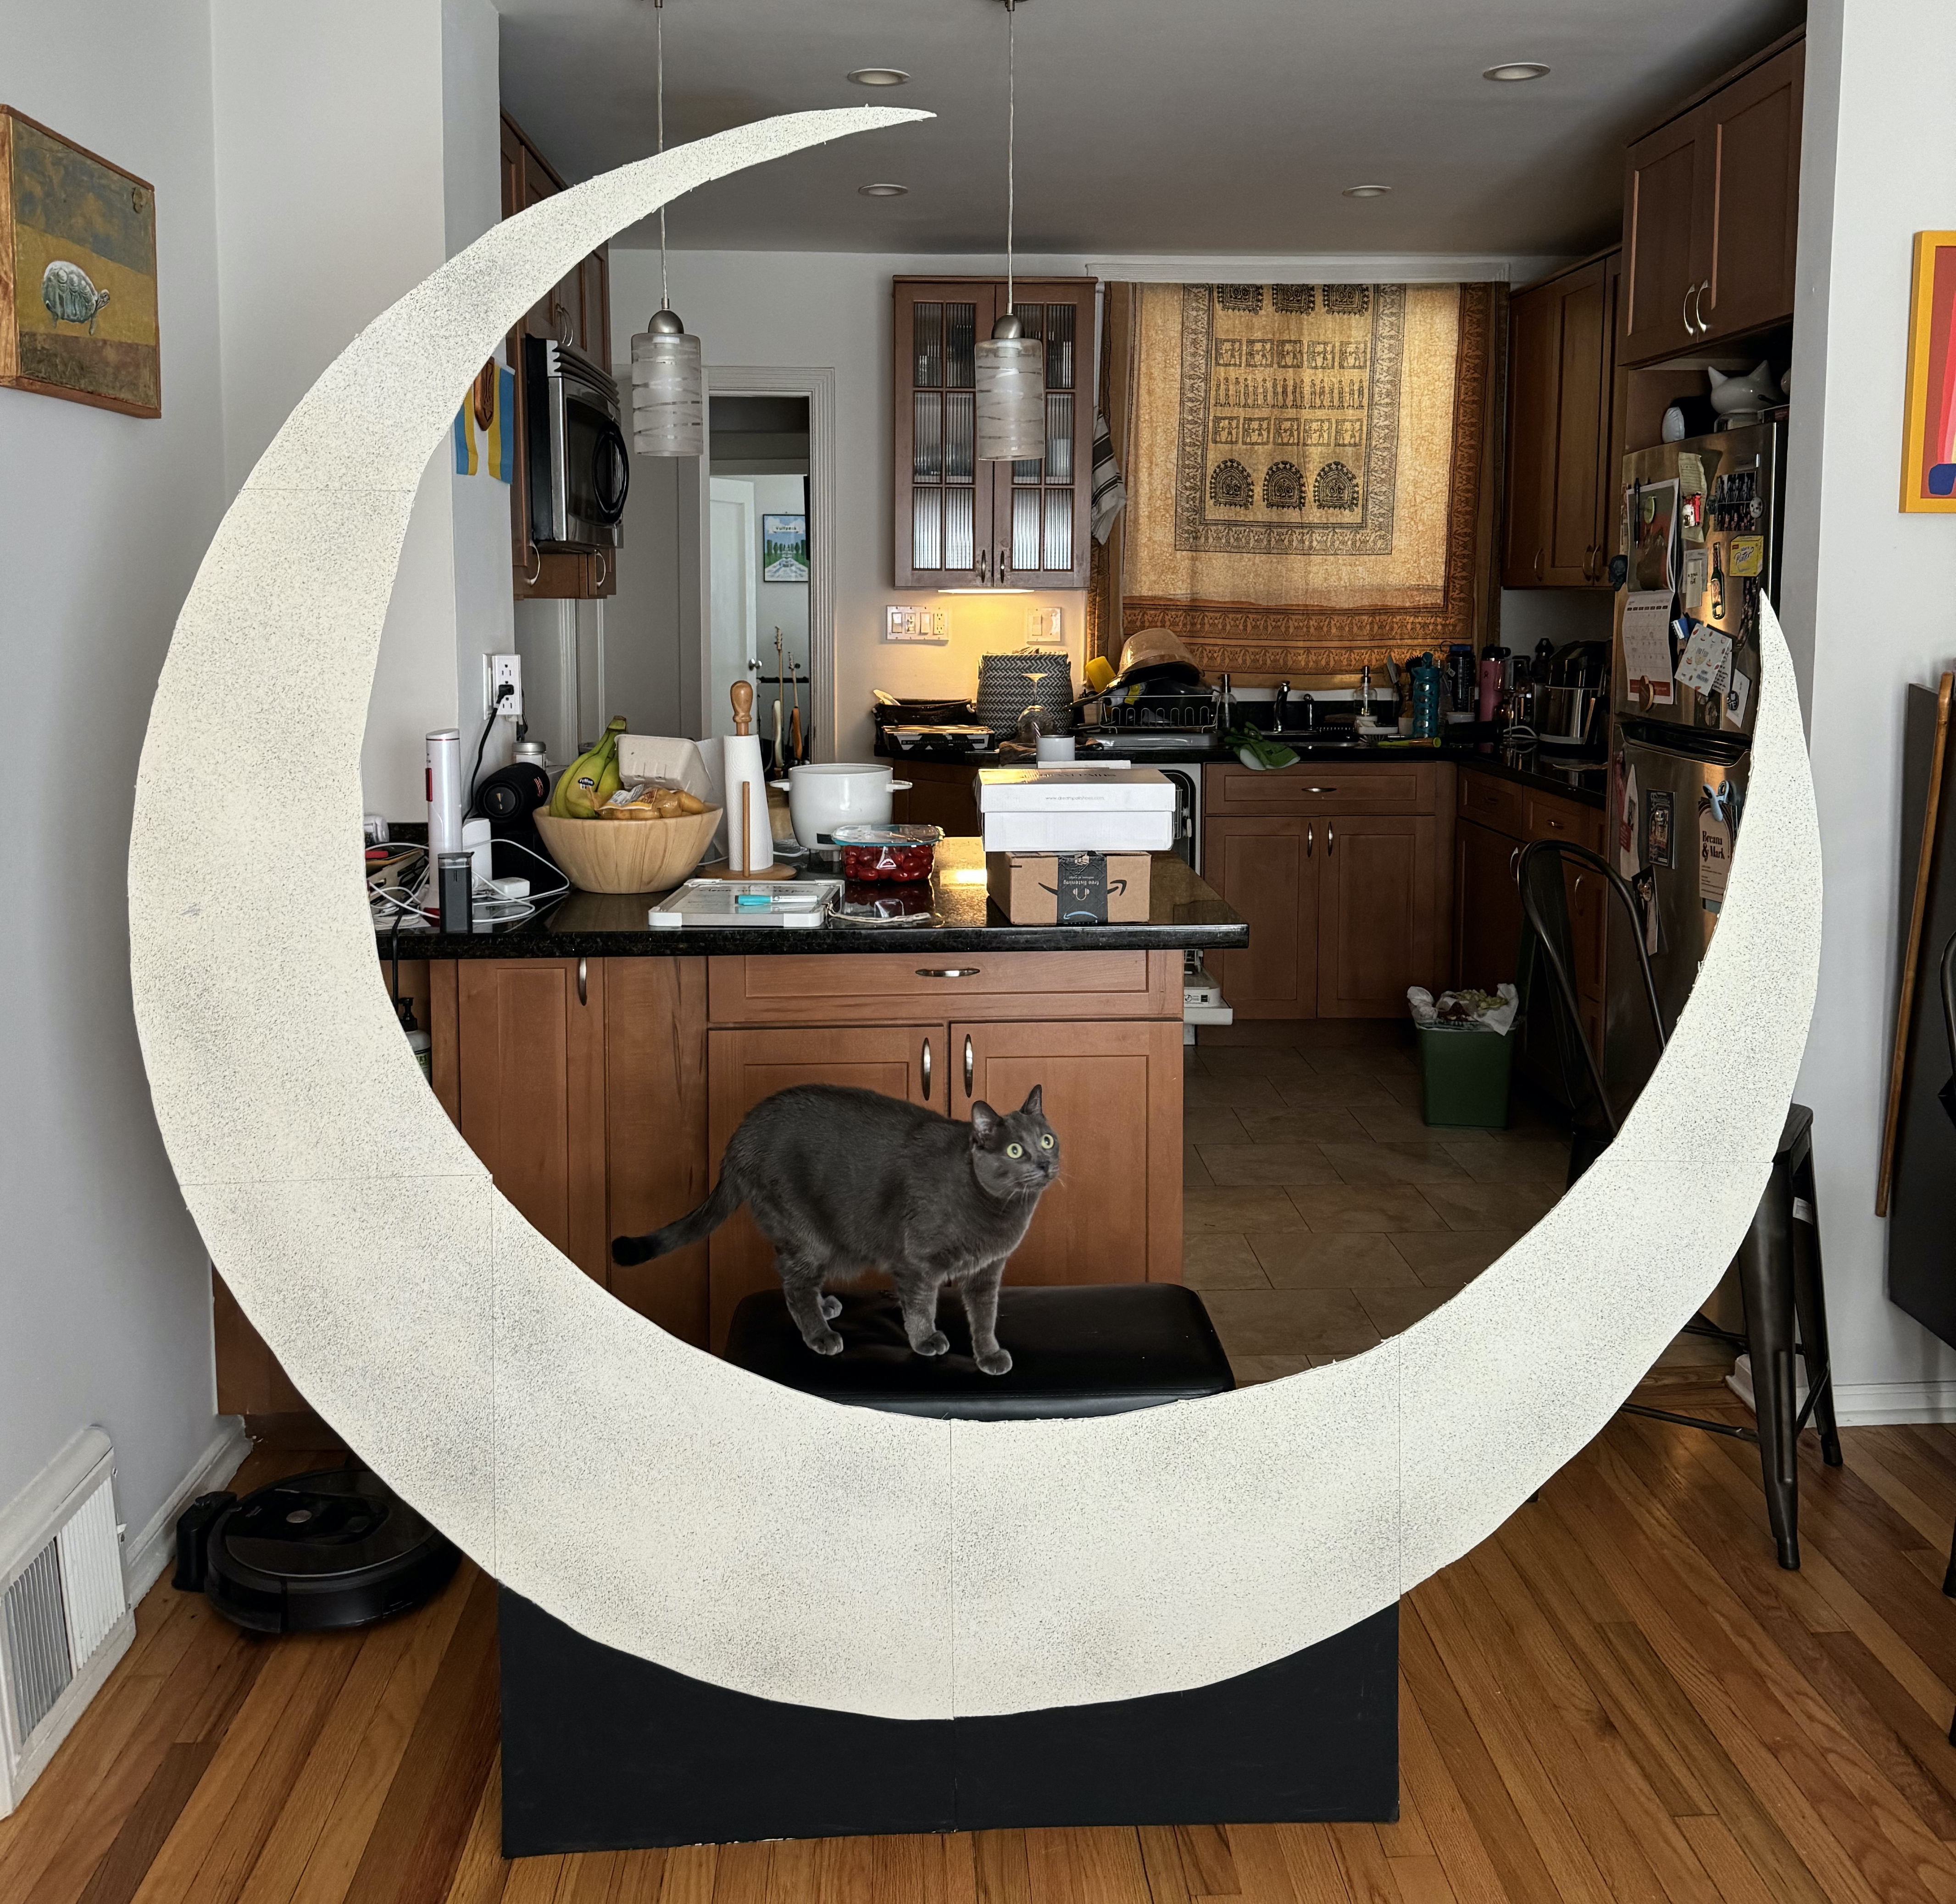 steadman testing it all out
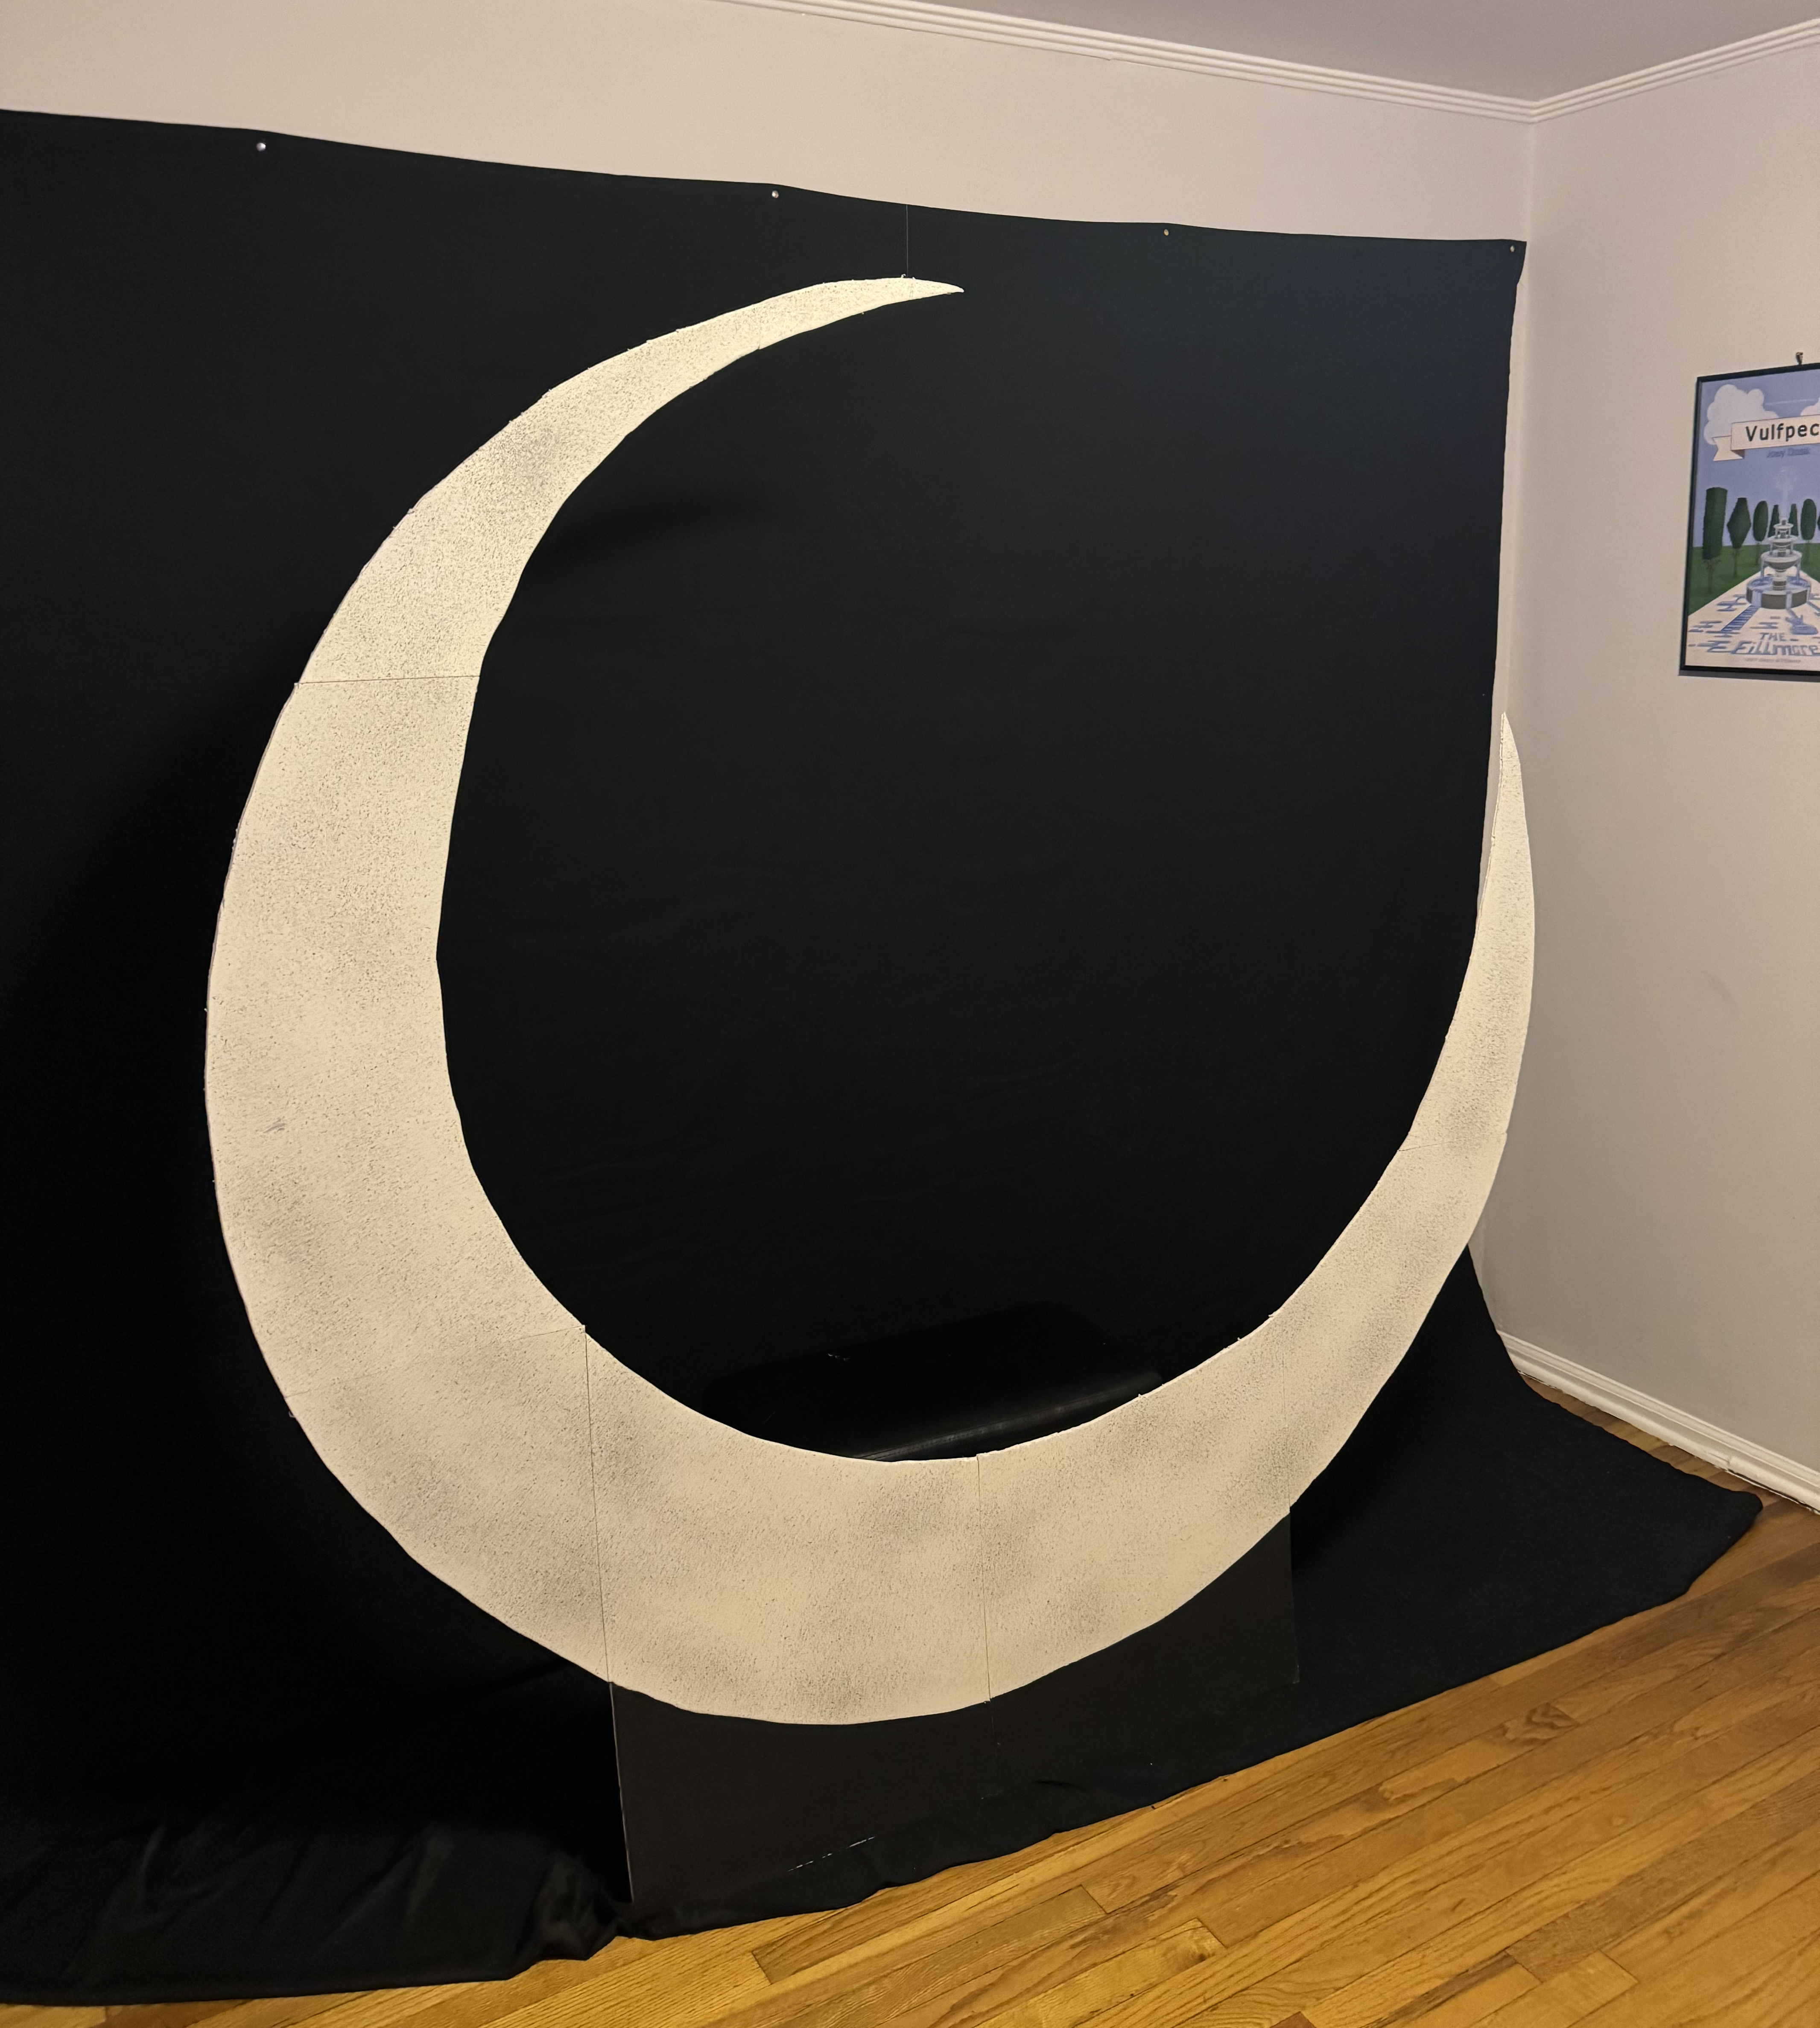 set up in the studio (my home office)
FINAL PRODUCT
After designing, building, and setting up the moon in a studio-like setting, all that was left was to take the pictures. Unfortunately I was unable to come up with a way to allow users to take the photo and print all on their own, but that’s a project for another time.
 Happy Halloween!